NotchToolkit alternatives and similar libraries
Based on the "UI" category.
Alternatively, view NotchToolkit alternatives based on common mentions on social networks and blogs.
-
-
DZNEmptyDataSet
A drop-in UITableView/UICollectionView superclass category for showing empty datasets whenever the view has no content to display -
-
-
-
-
IQKeyboardManager
Codeless drop-in universal library allows to prevent issues of keyboard sliding up and cover UITextField/UITextView. Neither need to write any code nor any setup required and much more. -
-
SkeletonView
☠️ An elegant way to show users that something is happening and also prepare them to which contents they are awaiting -
animated-tab-bar
:octocat: RAMAnimatedTabBarController is a Swift UI module library for adding animation to iOS tabbar items and icons. iOS library made by @Ramotion -
-
TTTAttributedLabel
A drop-in replacement for UILabel that supports attributes, data detectors, links, and more -
-
-
MGSwipeTableCell
An easy to use UITableViewCell subclass that allows to display swippable buttons with a variety of transitions. -
JTAppleCalendar
The Unofficial Apple iOS Swift Calendar View. Swift calendar Library. iOS calendar Control. 100% Customizable -
-
SWTableViewCell
An easy-to-use UITableViewCell subclass that implements a swippable content view which exposes utility buttons (similar to iOS 7 Mail Application) -
-
JVFloatLabeledTextField
UITextField subclass with floating labels - inspired by Matt D. Smith's design: http://dribbble.com/shots/1254439--GIF-Mobile-Form-Interaction?list=users -
-
XLForm
XLForm is the most flexible and powerful iOS library to create dynamic table-view forms. Fully compatible with Swift & Obj-C. -
FSPagerView
FSPagerView is an elegant Screen Slide Library. It is extremely helpful for making Banner View、Product Show、Welcome/Guide Pages、Screen/ViewController Sliders. -
TPKeyboardAvoiding
A drop-in universal solution for moving text fields out of the way of the keyboard in iOS -
SideMenu
Simple side/slide menu control for iOS, no code necessary! Lots of customization. Add it to your project in 5 minutes or less. -
SwipeCellKit
Swipeable UITableViewCell/UICollectionViewCell based on the stock Mail.app, implemented in Swift. -
-
-
Alerts & Pickers
Advanced usage of UIAlertController and pickers based on it: Telegram, Contacts, Location, PhotoLibrary, Country, Phone Code, Currency, Date... -
SwiftEntryKit
SwiftEntryKit is a presentation library for iOS. It can be used to easily display overlays within your iOS apps. -
-
-
PageMenu
A paging menu controller built from other view controllers placed inside a scroll view (like Spotify, Windows Phone, Instagram) -
Material Components
[In maintenance mode] Modular and customizable Material Design UI components for iOS -
SWRevealViewController
A UIViewController subclass for presenting side view controllers inspired on the FaceBook and Wunderlist apps, done right ! -
CSStickyHeaderFlowLayout
UICollectionView replacement of UITableView. Do even more like Parallax Header, Sticky Section Header. Made for iOS 7. -
expanding-collection
:octocat: ExpandingCollection is an animated material design UI card peek/pop controller. iOS library made by @Ramotion

WorkOS - The modern identity platform for B2B SaaS


* Code Quality Rankings and insights are calculated and provided by Lumnify.
They vary from L1 to L5 with "L5" being the highest.
Do you think we are missing an alternative of NotchToolkit or a related project?


README
NotchToolkit
NotchToolkit is a framework for iOS that allow developers use the iPhone X notch space in creative ways. Inspired by I was working on this idea of blending app design with the #iPhoneX notch. 📲🤗 pic.twitter.com/lj2AhxWNeE— Luboš Volkov⚡️ (@0therPlanet) September 18, 2017
| Table of Contents | Description |
|---|---|
| Documentation | Describes the configuration options NotchToolkit offers |
| Preview | Displays preview images of NotchToolkit features |
| Compatibility | Describes the NotchToolkit device and iOS compatibality |
| Example Project | Explains how to run the example project provided in this repository |
| Installation | Describes the CocoaPods, Carthage, and Manual options to install NotchToolkit |
| Implementation | Lists the steps needed to implement NotchToolkit into your project |
| More Options | Describes an extra feature NotchToolkit supports |
| License | Describes NotchToolkit license |
Preview

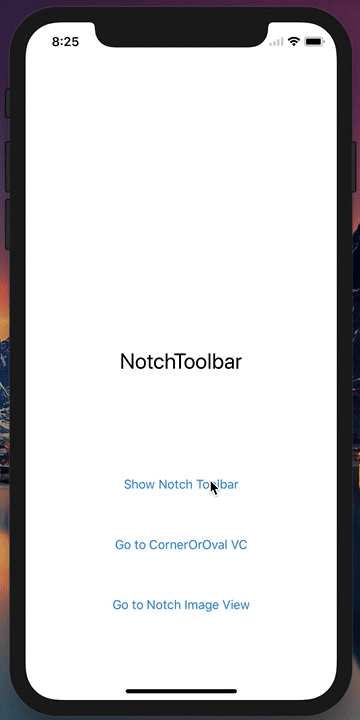
[drawPreview](drawNotch.gif)
Compatibility
Although NotchToolkit is made for iPhone X, it can be implemented in older iPhone devices. This framework was tested on:
- iPhone X
- iPhone 8 plus, 7 plus, 6s plus and 6 plus
- iPhone 8, 7, 6s and 6
- iPhone SE and 5s
NotchToolkit requires
- iOS 11
- Swift 3.2 or higher
NotchToolkit has options to customize your Toolbar and UIView,
check Documentation and More Options for more details.
Example Project
To try the example project, simply download this repo then open NotchToolkit-Example.xcworkspace project file, found in the Example folder.
Installation
CocoaPods
- Download CocoaPods using this command in
Terminal$ sudo gem install cocoapods - Redirect to your project folder in
Terminal$ cd YOUR_PROJECT_FILE_PATH - Initialize a pod in
Terminal$ pod init - Open Podfile in a text editor and add this line
pod 'NotchToolkit' - Go back to
Terminaland install the pod$ pod install### Carthage - Add this line to the
Cartfilein your project directorygithub "AFathi/NotchToolkit" - Update your Carthage directory
$ carthage update### Manual Drag theNotchToolkit.xcodeprojfile into your project then addNotchToolkitas an embedded binary of your targets.
Implement in your project
import NotchToolkitin aUIViewControllerclass- Add
NotchToolbarDelegatein the delegate sectionclass ViewController: UIViewController, NotchToolbarDelegate - Add delegate methods ``` //A protocol method that's triggered when the device rotates. func deviceDidRotate() { }
//A protocol method that's triggered when an icon is selected. func didTapToolIcon(_ tools: UICollectionView, toolIndex: IndexPath, section: Int, row: Int) { }
4. Create a [`NotchToolbar`](https://github.com/AFathi/NotchToolkit/wiki/NotchToolbar) global variable
let toolbar = NotchToolbar()
5. Configure and initialize `toolbar` in `viewDidLoad`
toolbar.notch.isVisible = true
toolbar.notch.height = 250
toolbar.toolList = [ //[icon image, title] [UIImage(named:"pikachusquare")!, "Pikachu"], //only image icons UIImage(named:"spongebob")!, //only string icons (mainly for emojis 😉) "🤔", "🤓", "📱", "👩💻", "👨💻", "✅", "🔥"]
toolbar.delegate = self toolbar.initializeToolbar(self)
6. Call [`autoResize()`](https://github.com/AFathi/NotchToolkit/wiki/NotchToolbar#func-autoresize) method in the [`deviceDidRotate`](https://github.com/AFathi/NotchToolkit/wiki/NotchToolbarDelegate#func-devicedidrotate) delegate method
func deviceDidRotate() { toolbar.autoResize() }
**You're all set! 🤓**
## Show and Hide `toolbar`
### [showOrHide()](https://github.com/AFathi/NotchToolkit/wiki/NotchToolbar#func-showorhide)
This method allows you to show and hide the `NotchToolbar`. You can call this method in an `IBAction` that handles showing/hiding the toolbar.
@IBAction func buttonClicked(_ sender: UIButton) { toolbar.showOrHide() }
## Handle Icon Selection
1. Make sure you set the [`NotchToolbar`](https://github.com/AFathi/NotchToolkit/wiki/NotchToolbar) delegate to `self`.
2. Handle the icon selection in the [`didTapToolIcon`](https://github.com/AFathi/NotchToolkit/wiki/NotchToolbarDelegate#func-didtaptoolicon_-tools-uicollectionview-toolindexindexpath-section-int-row-int) delegate method:
func didTapToolIcon(_ tools: UICollectionView, toolIndex: IndexPath, section: Int, row: Int) { if row == 0 { print("first icon") }else if row == 1 { print("second icon") } }
## More Options
This framework include a `UIView` extension that allow you draw a notch bezier path to any `UIView` class or subclass.
### draw(_ notch:curveType, position:curvePosition, curve:CGFloat?, customBounds:CGRect? = nil)
This is a UIView extension that allows you add ovals and rounded corners to any UIView.

- For type `oval`, set `curve` scale from 1.0 - 10.0.
- For type `corner`, `curve` is the radius size.
- Check `curveType` & `curvePosition` for more info.
### Example
//horizontalSides draws an oval-based bezier path vertically on the right & left sides of a view. myView.draw(.oval, position: .horizontalSides, curve: 1.5)
//diagonalAC draws rounded rectangle corners diagonally from topLeft to bottomRight of a view. myView.draw(.corner, position: .diagonalAC, curve: 35)
### Preview

## LICENSE
`NotchToolkit` is under MIT license. Check the [LICENSE](LICENSE) file for more details.
*Note that all licence references and agreements mentioned in the NotchToolkit README section above
are relevant to that project's source code only.